THE FIRST BROADCAST GUIDE
Your first song.
Your own
radio station.
Get your song playing, then give the world a place to listen.
12 clear steps · Real interface screenshots
FREO 1.0.2 · A guide from 3andB, Inc.
Read online: freo.studio/guides/first-song/
Before you press play
Have your station-ready email, your station password, and one or two songs you have permission to broadcast. Use a laptop or desktop for your first setup.
Screenshots show an isolated example station, Ocean Drive Radio. Use your own station name and address. Appearance may vary with your chosen theme.
Your station. Your controls.
Sign in to your station
Open Open your station in your station-ready email or in Launch Station. Your administration address ends in /admin.
Enter your username or email and the station password you chose during setup, then select Sign in. For a new Studio installation, use your Studio account email.
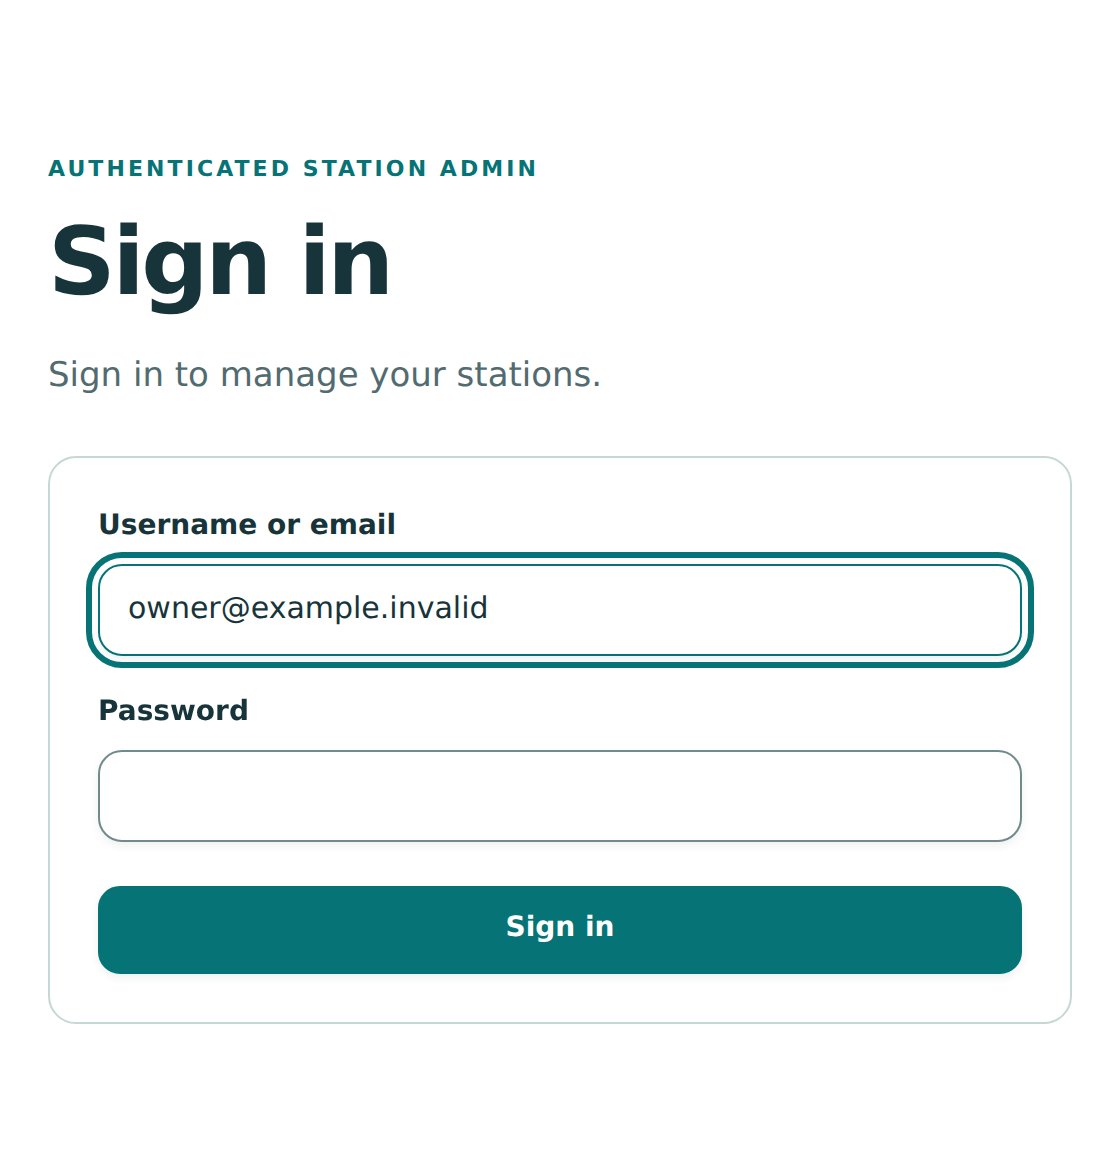
Give your sound a home.
Create your first station
Open Stations and find Add station. Enter a station name, such as Ocean Drive Radio, and a Station ID, such as ocean-drive.
Choose your timezone, add an optional description, then click Add station. Wait for the station to finish preparing; refresh if its status still says Preparing.
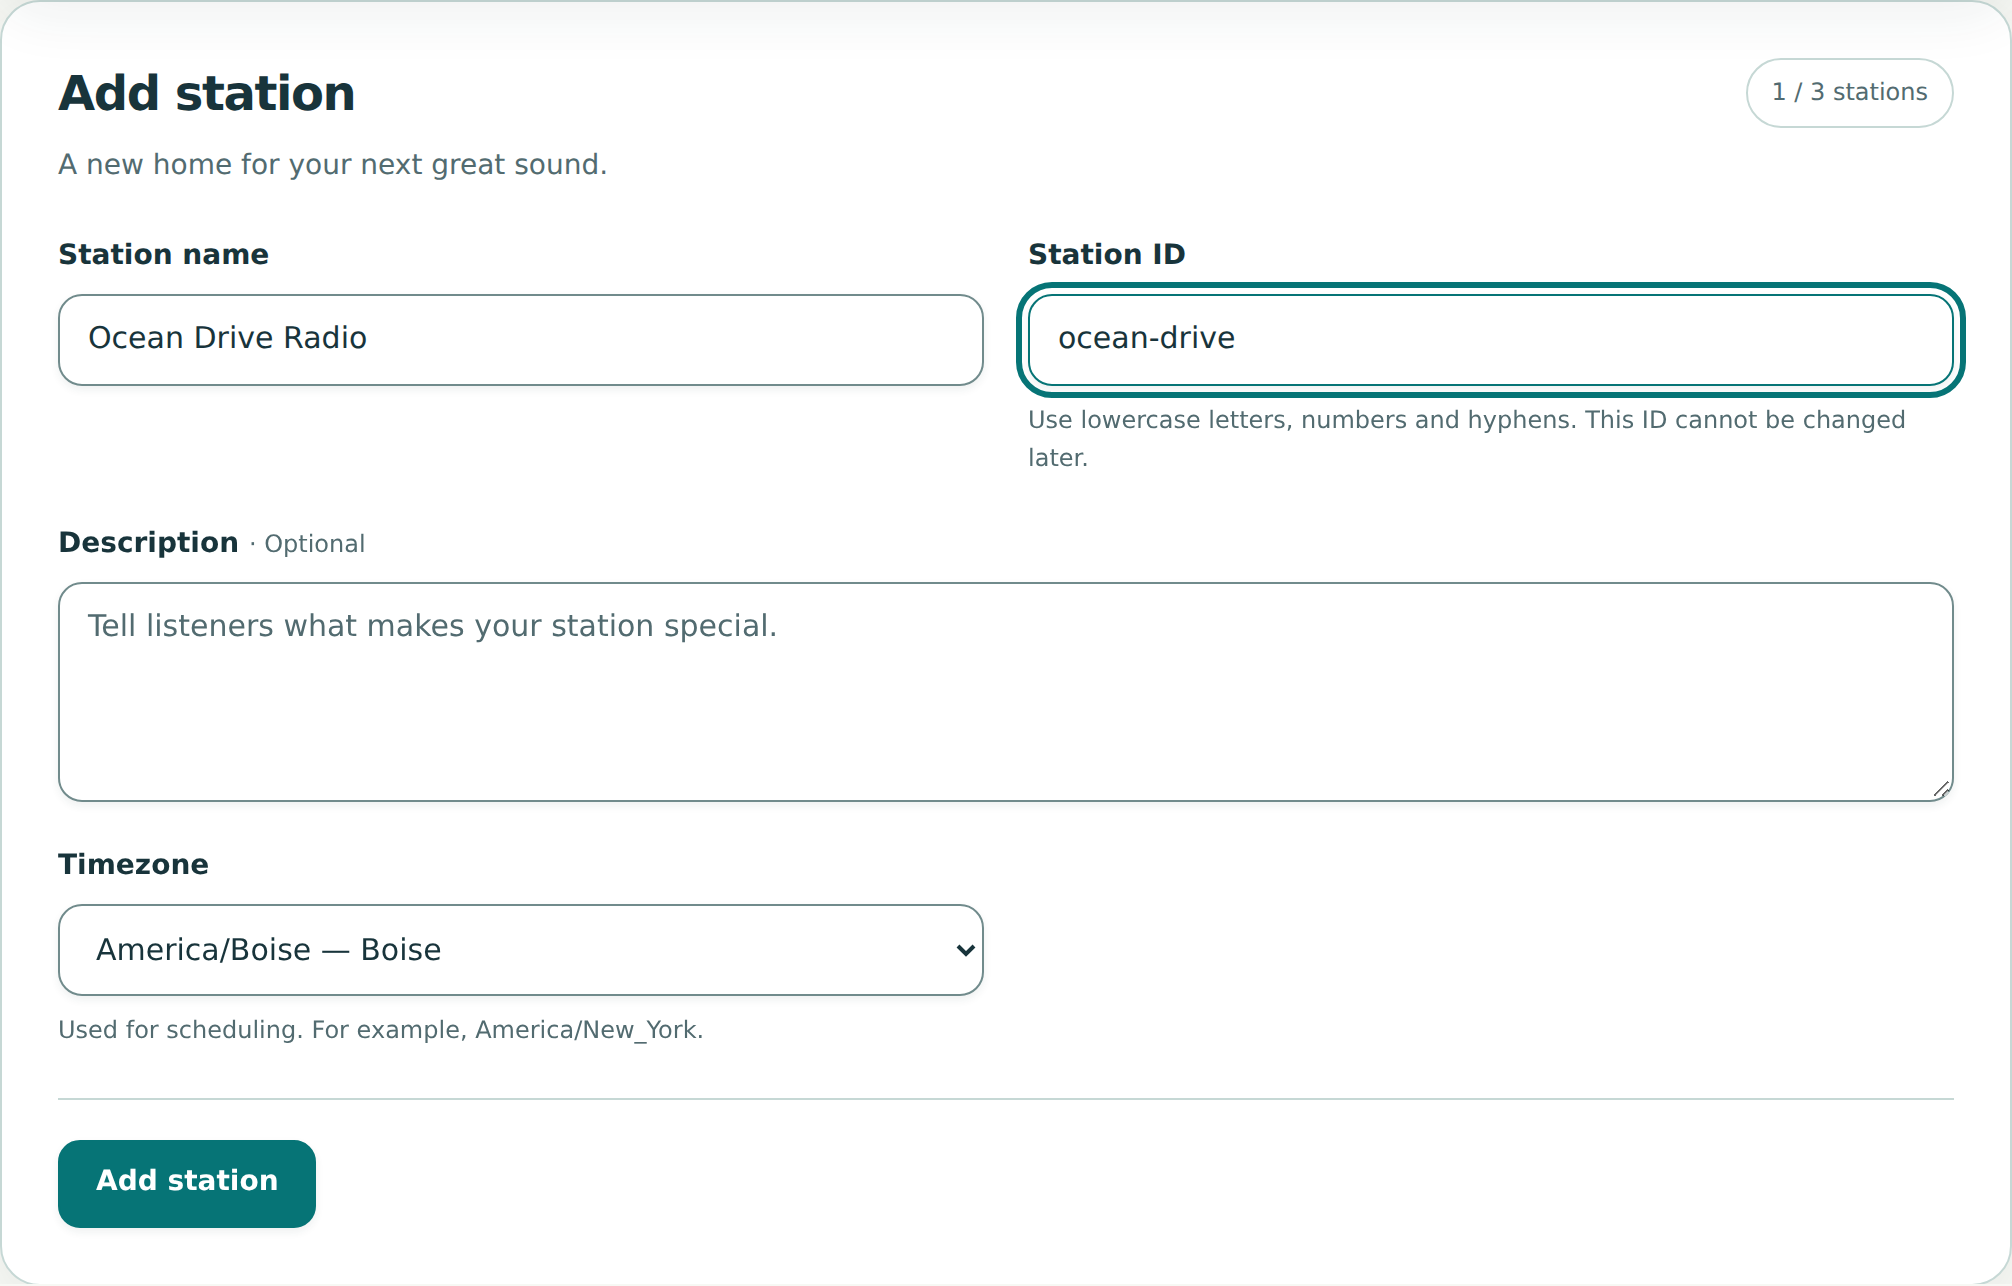
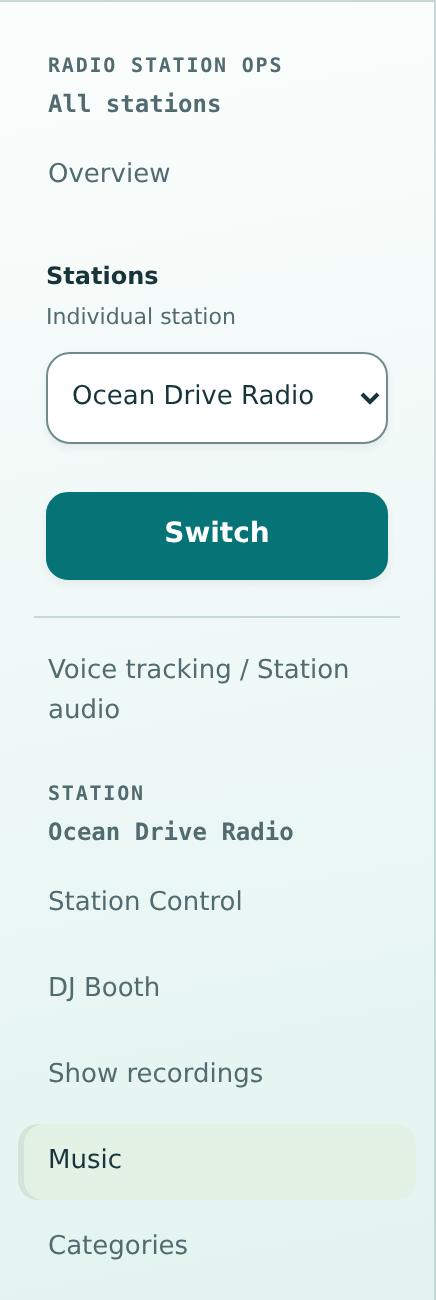
Make sure you’re in the right workspace.
Switch to your station
In the left sidebar, open Select station, choose your new station, then click Switch.
Check that your station name appears above the station tools. You should now see Station Control, Music and Playlists.
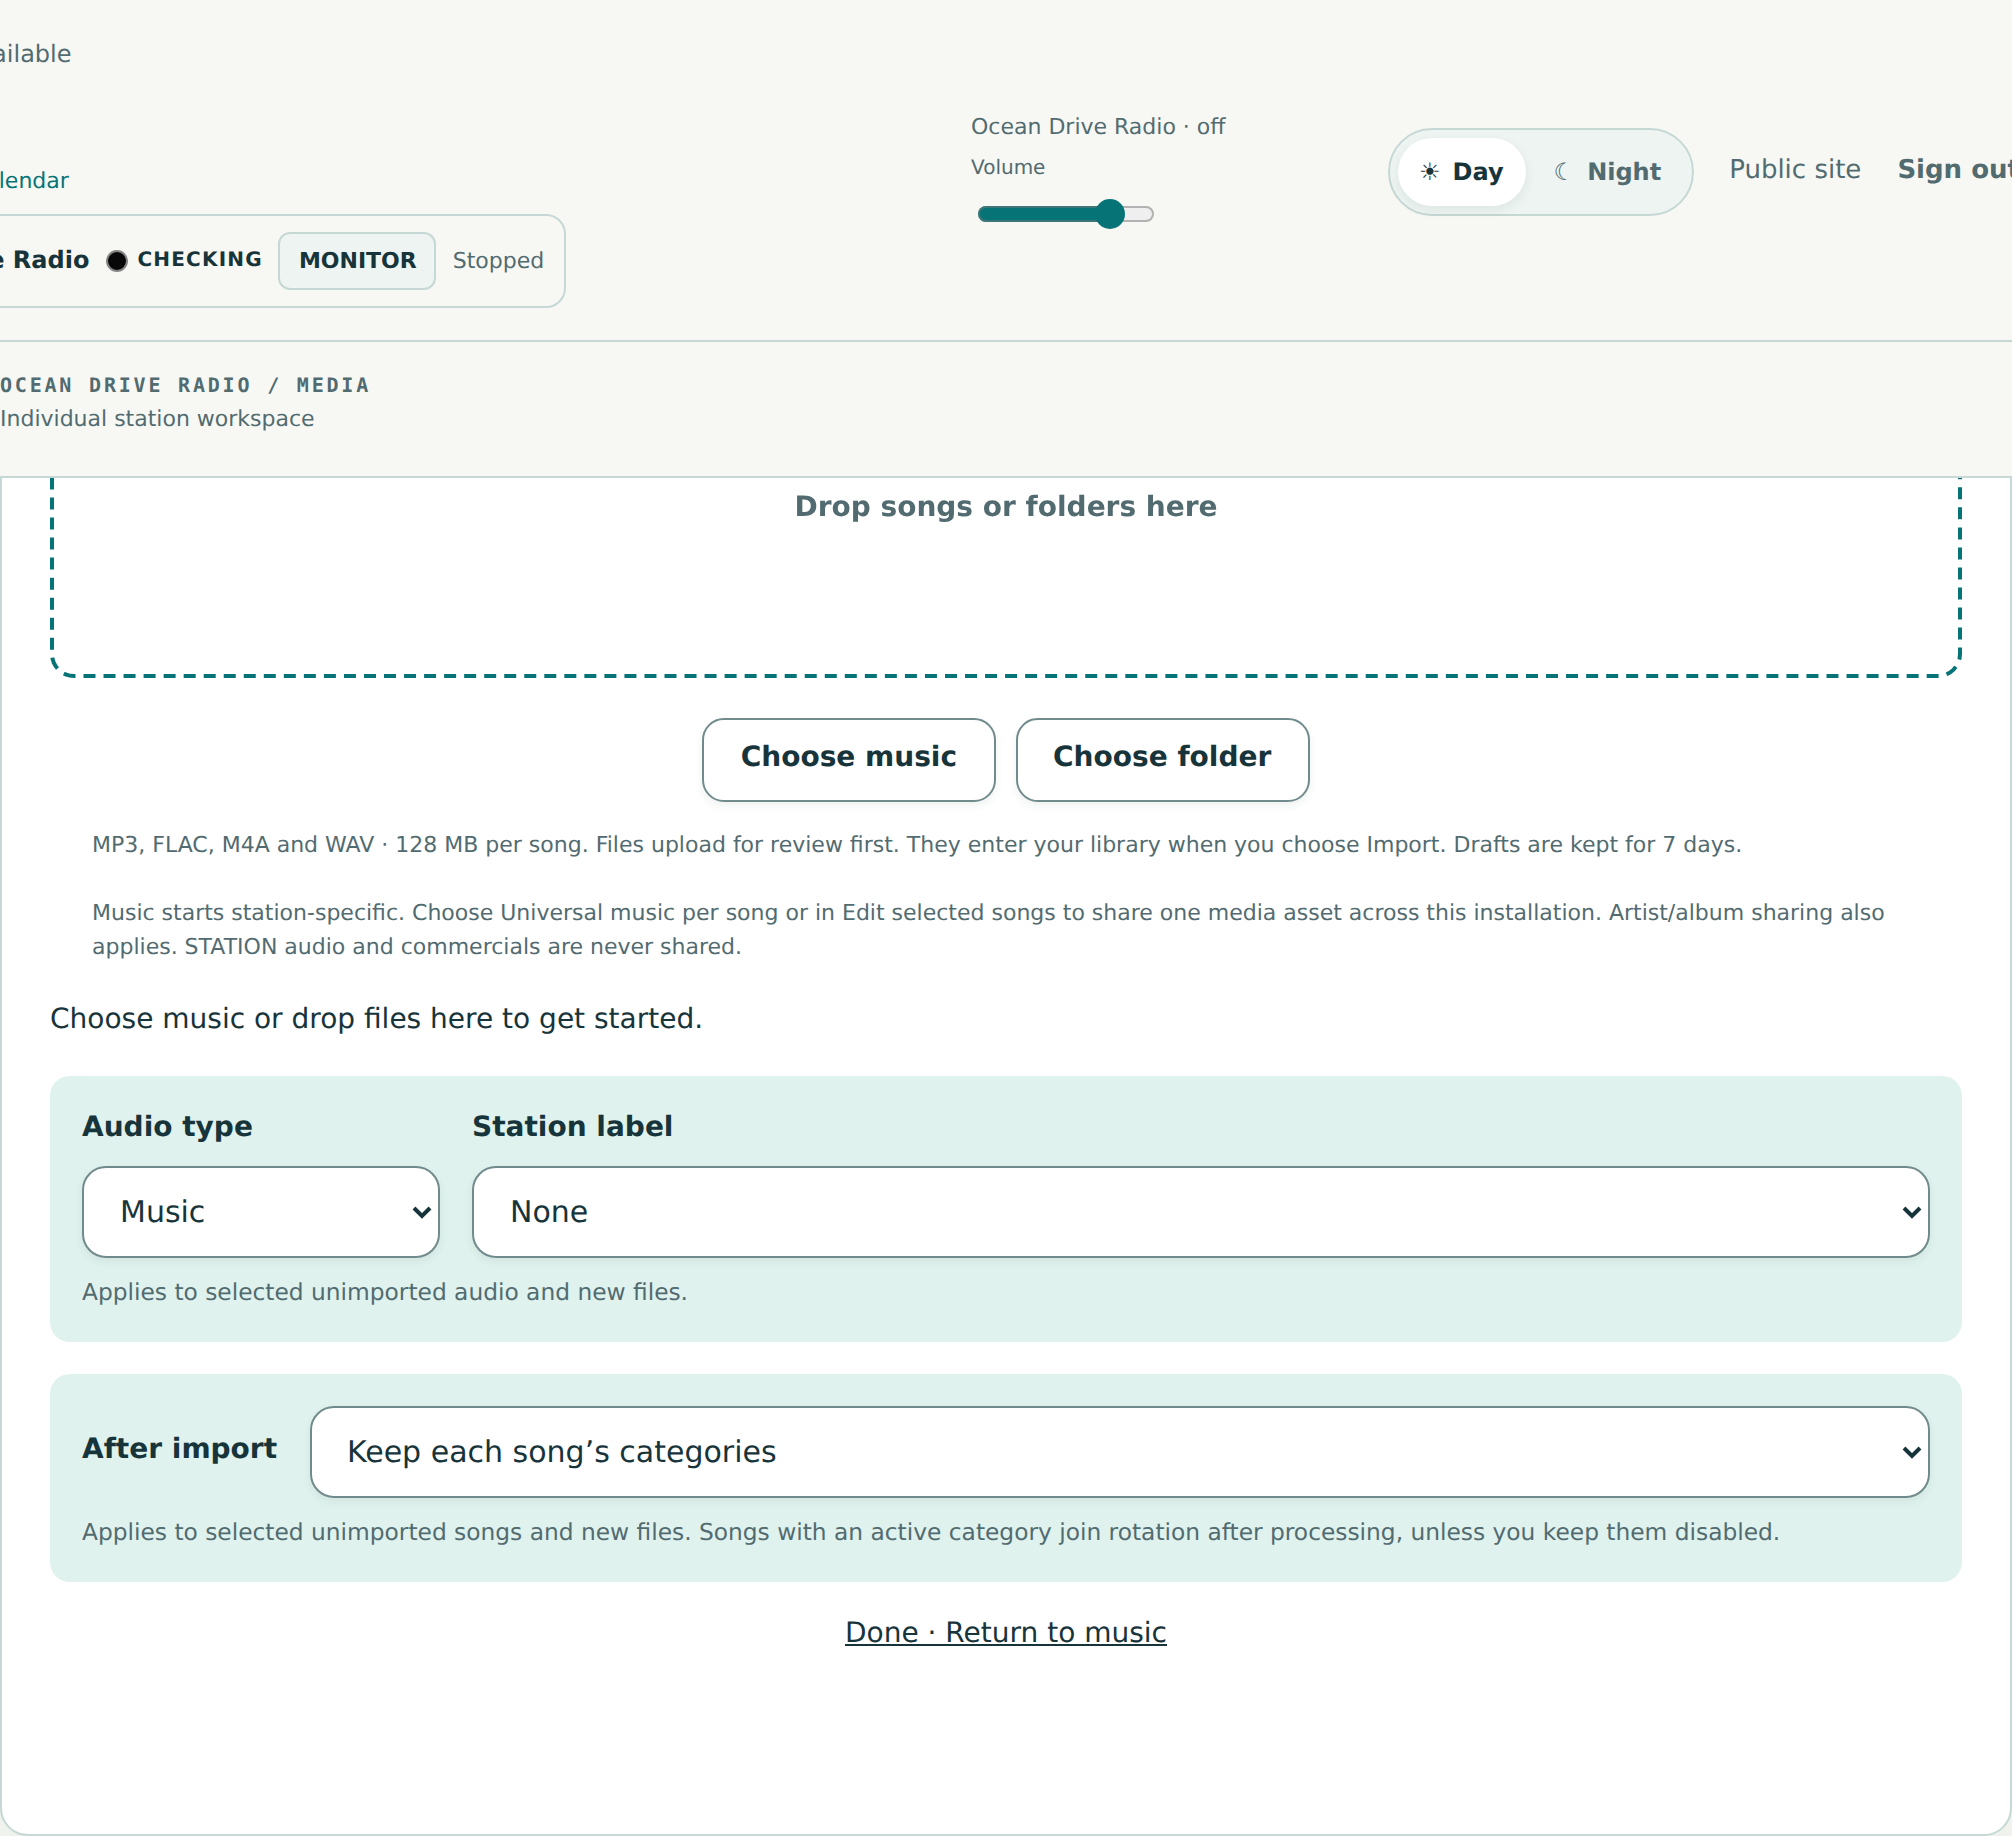
Your first tracks, ready for radio.
Upload a song or two
Click Music, then Import music. Select Choose music or drag one or two audio files into the upload area.
Wait for the review cards, check the song details, then click Import music to finish. Use Done · Return to music to return to your library. Let processing complete before broadcasting.
A little playlist. A whole new station.
Put your songs in Playlist 1
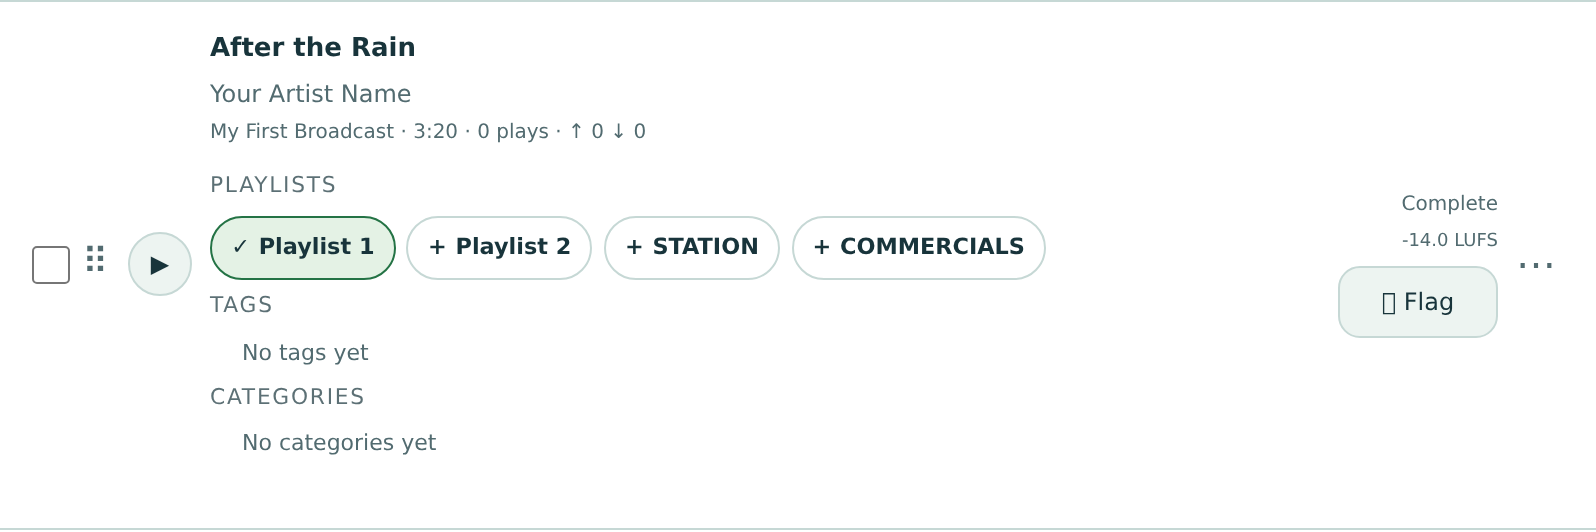
Back in Music, find each imported song. Under its PLAYLISTS labels, click + Playlist 1.
The label changes to ✓ Playlist 1. Repeat for your other song, then open Playlist 1 to check that both songs are included and available to play.
Bring the signal to life.
Turn on Master Broadcast
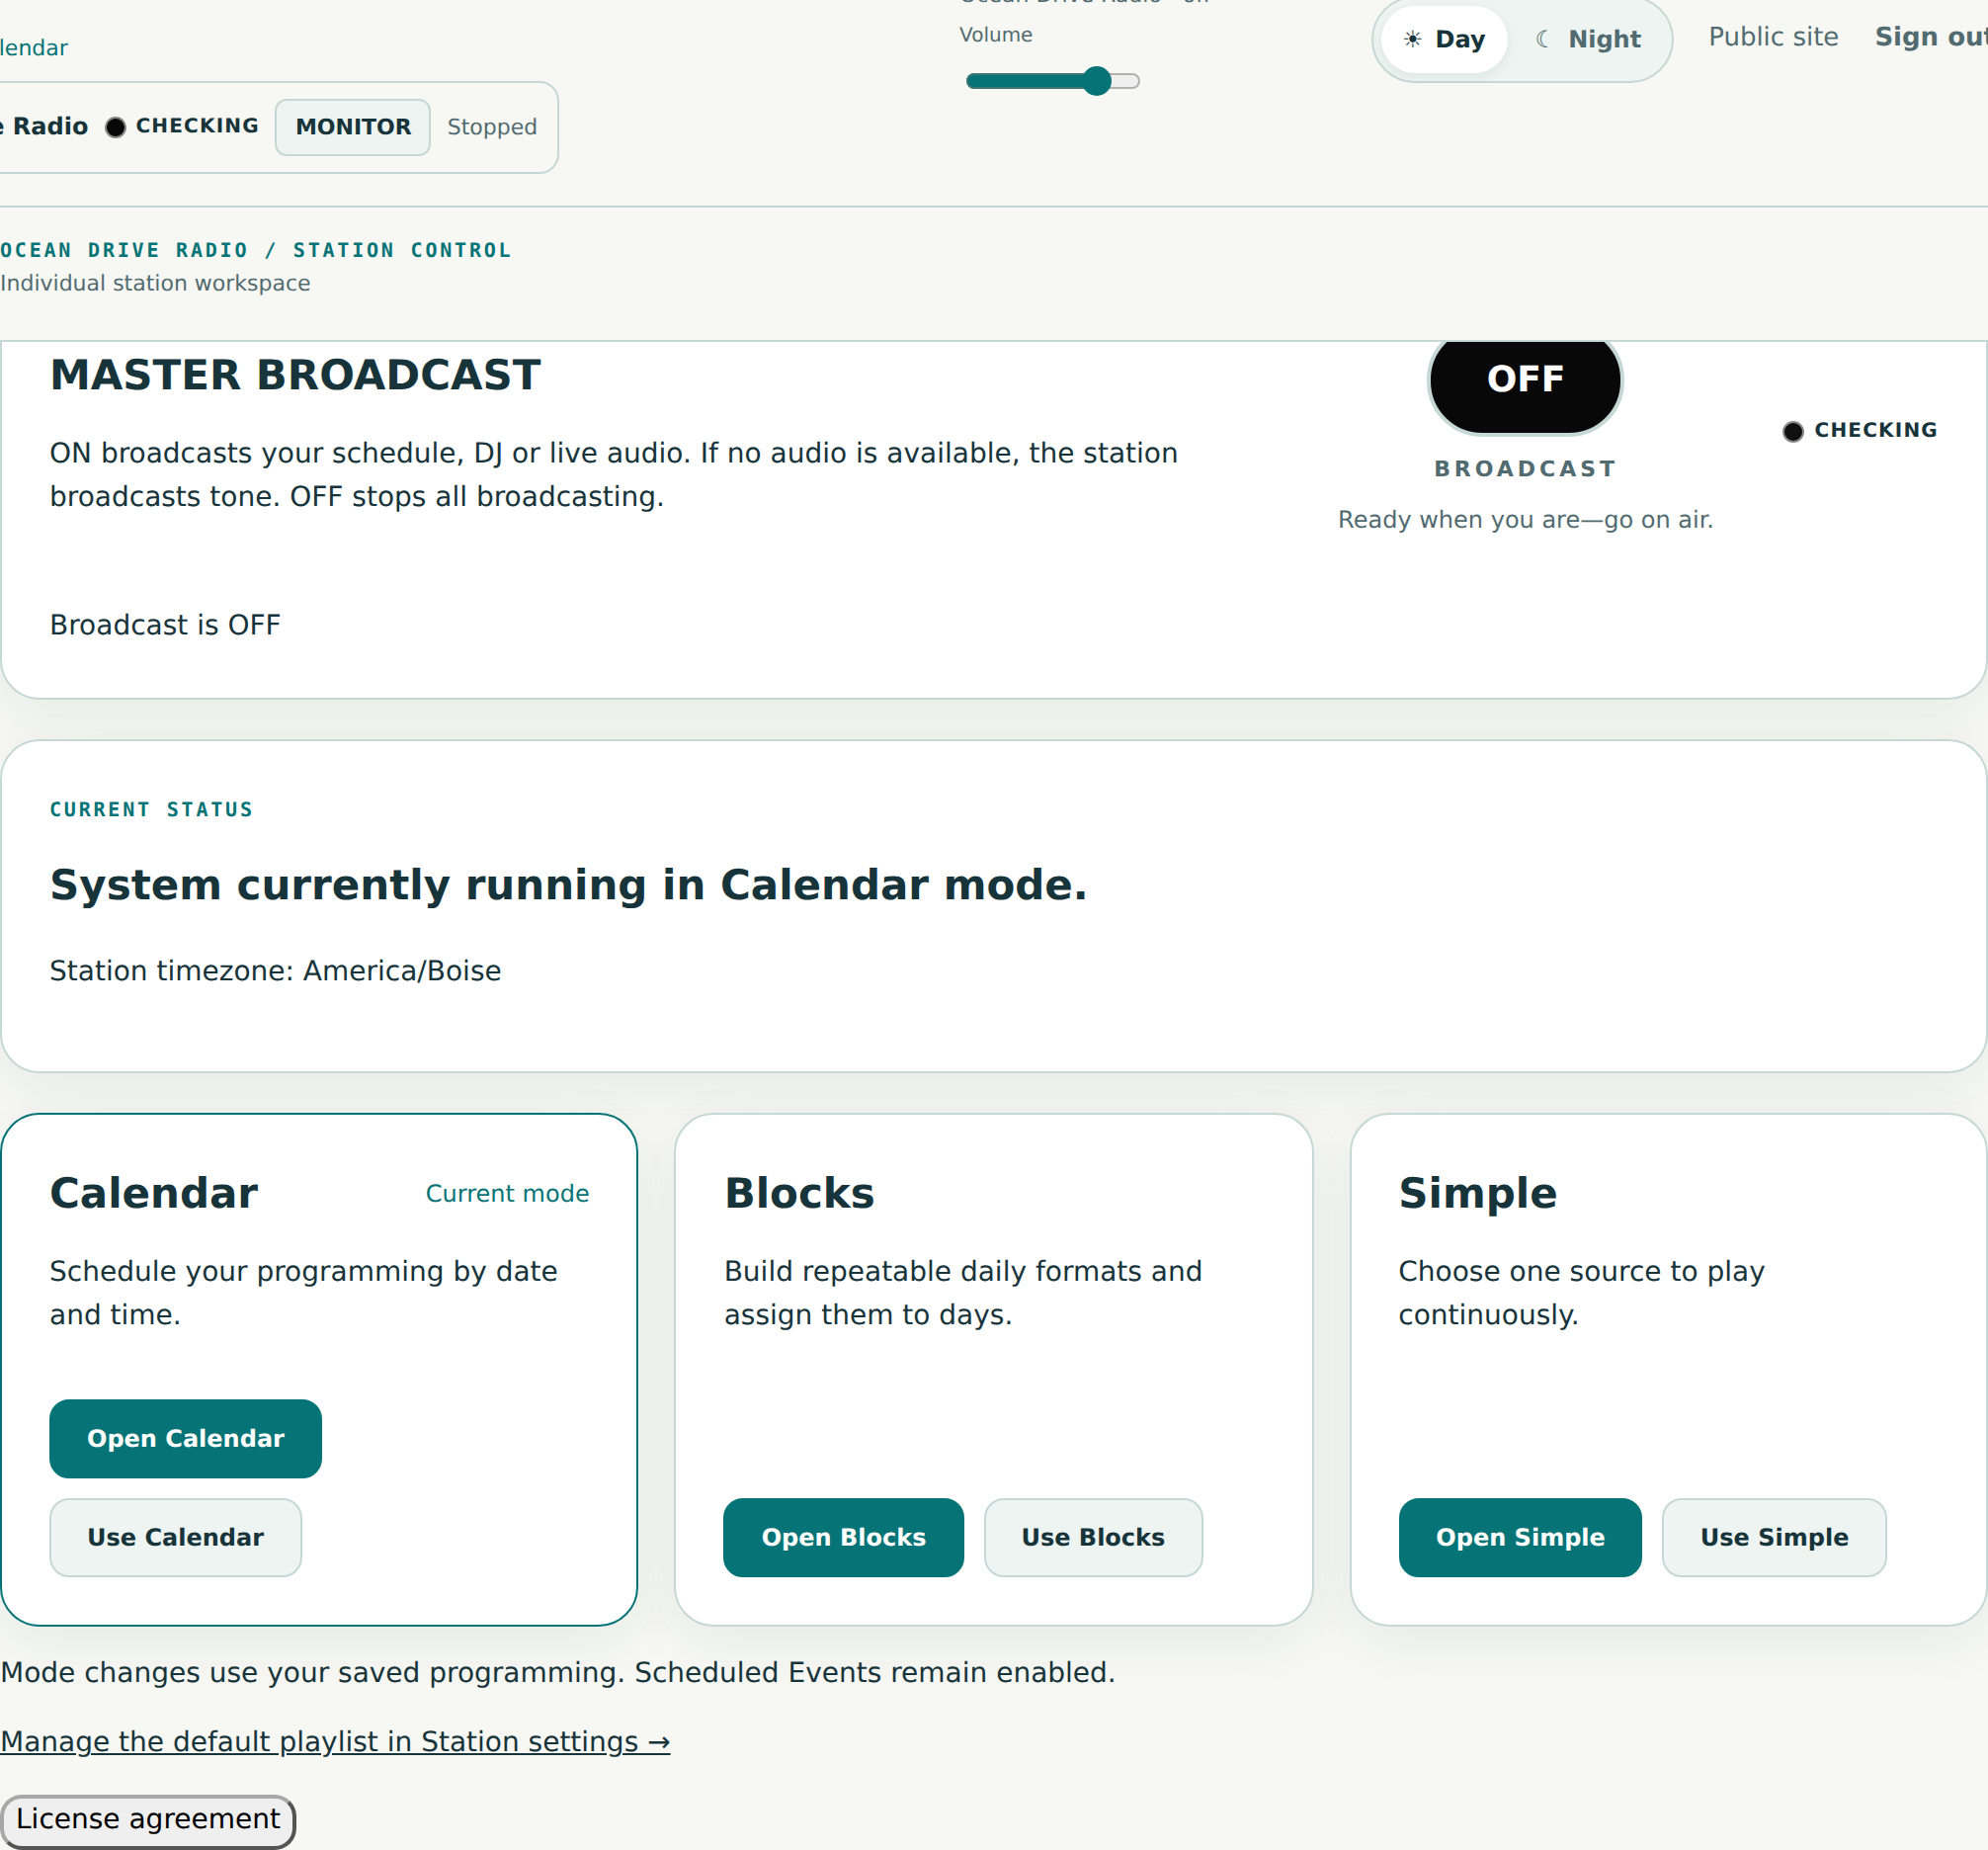
Open Station Control. In MASTER BROADCAST, click the switch so it changes from OFF to ON. Wait for the broadcast status to update.
Before music is scheduled, you may hear the station’s test tone. To check it, click MONITOR beside your station name at the top and make sure your volume is up.
The easiest way to keep music playing.
Open Simple
On Station Control, find the Simple card and click Open Simple.
Simple mode repeats a source continuously. For your first broadcast, that source will be Playlist 1.
Choose the sound of your station.
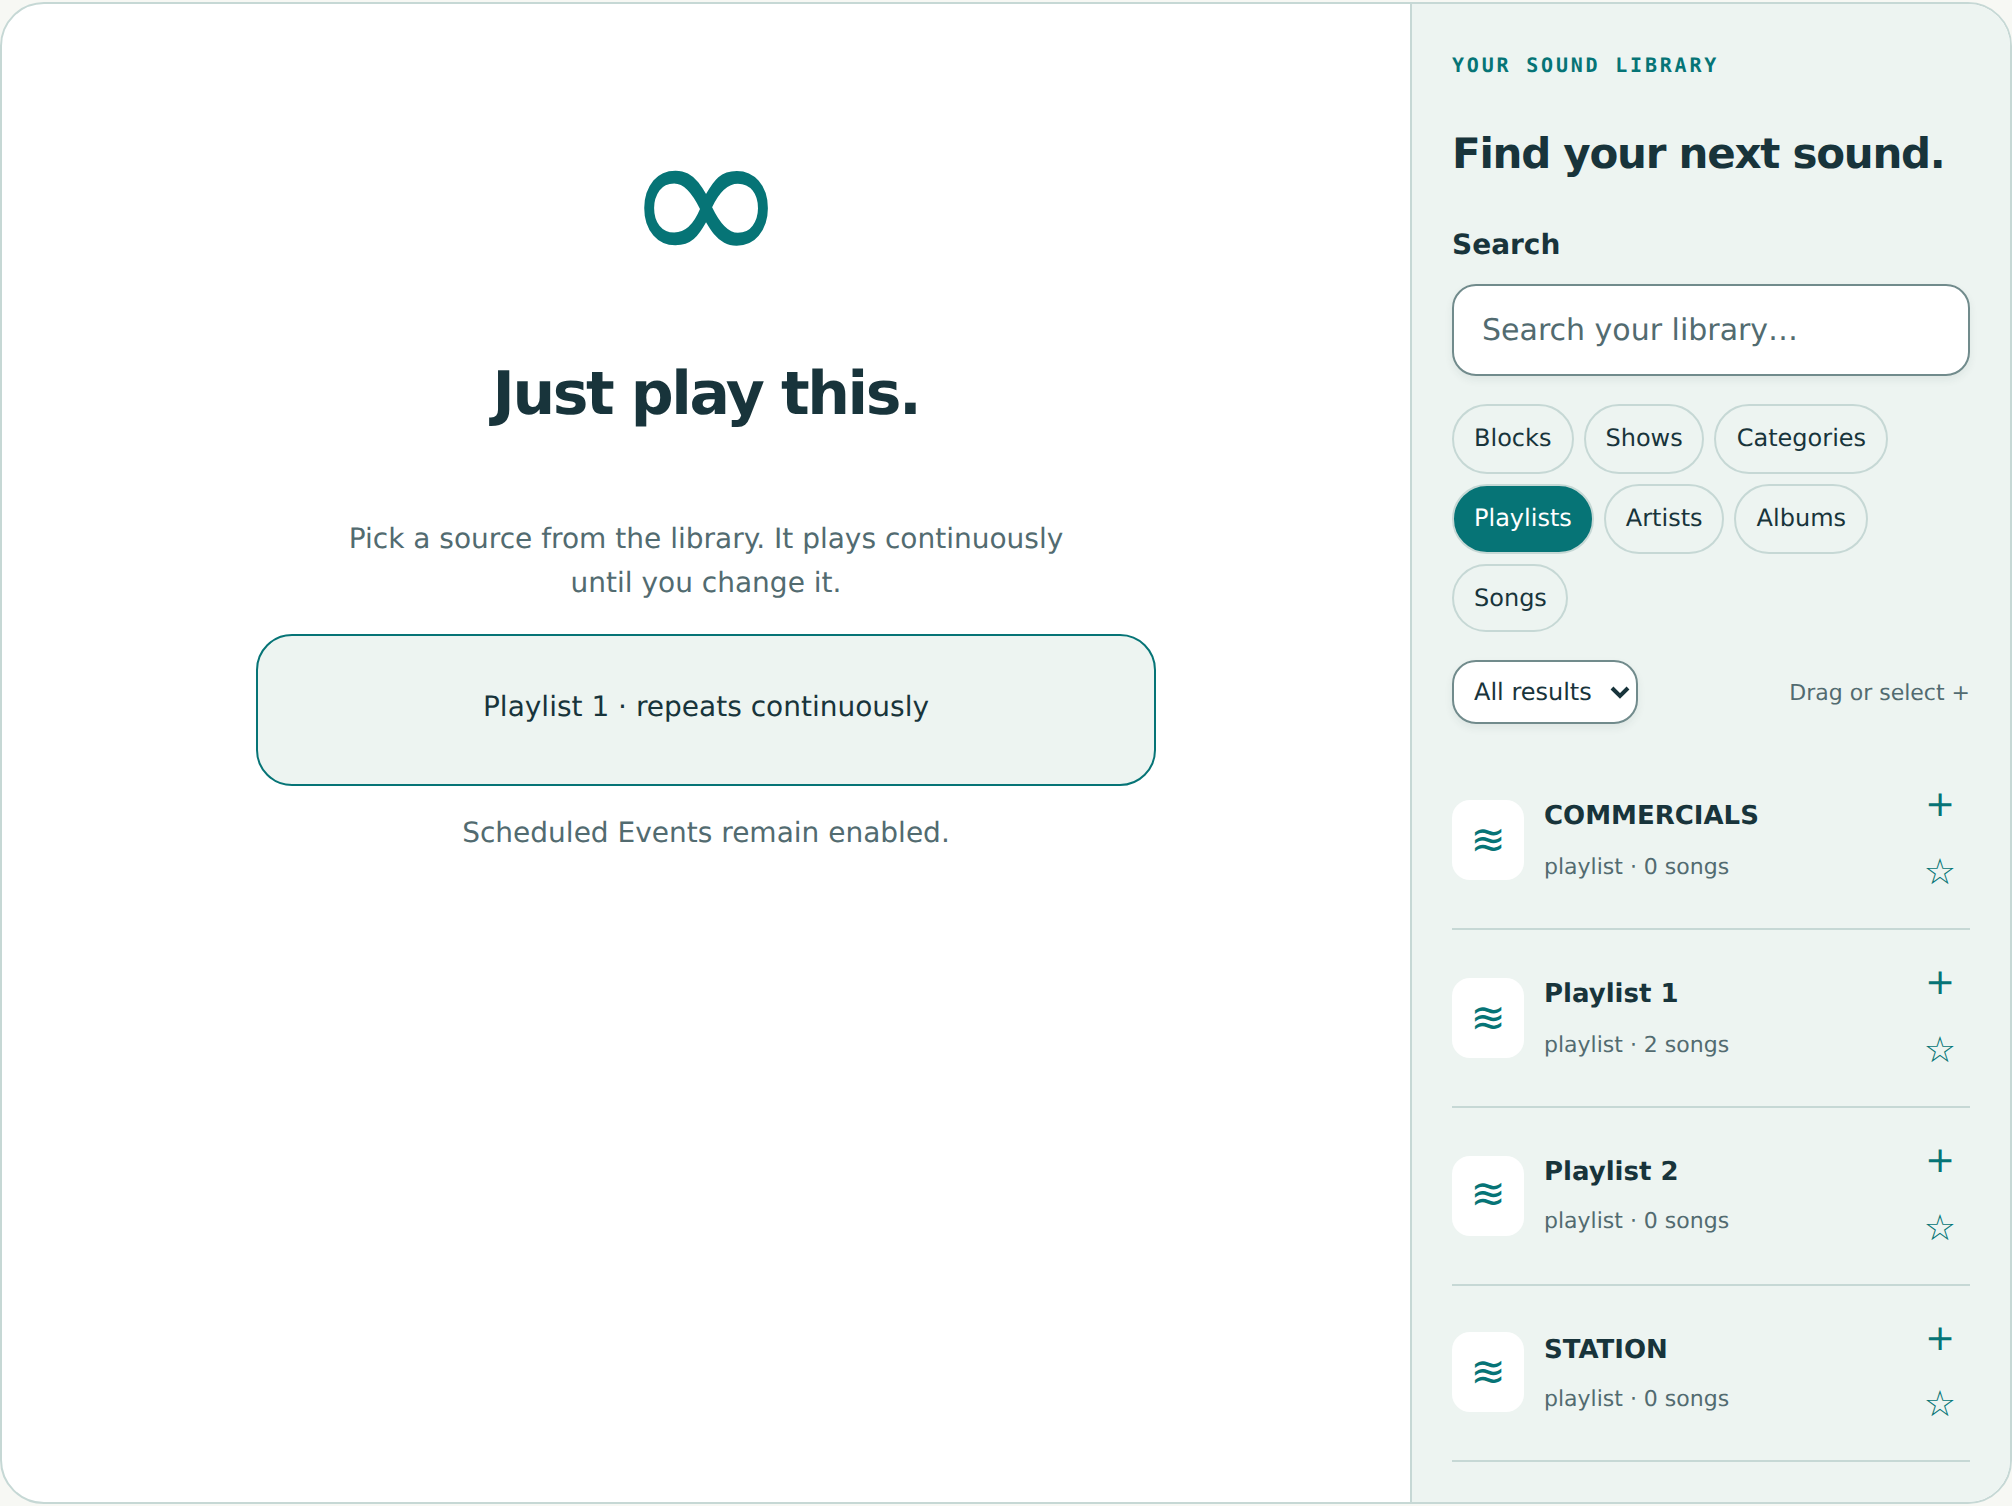
Drag Playlist 1 into “Just play this”
In Your sound library, select the Playlists tab. Find Playlist 1.
Drag its card onto the large Just play this. area. You should see Playlist 1 · repeats continuously. You can also use the playlist card’s + button to select it.
Make your choice stick.
Save your schedule
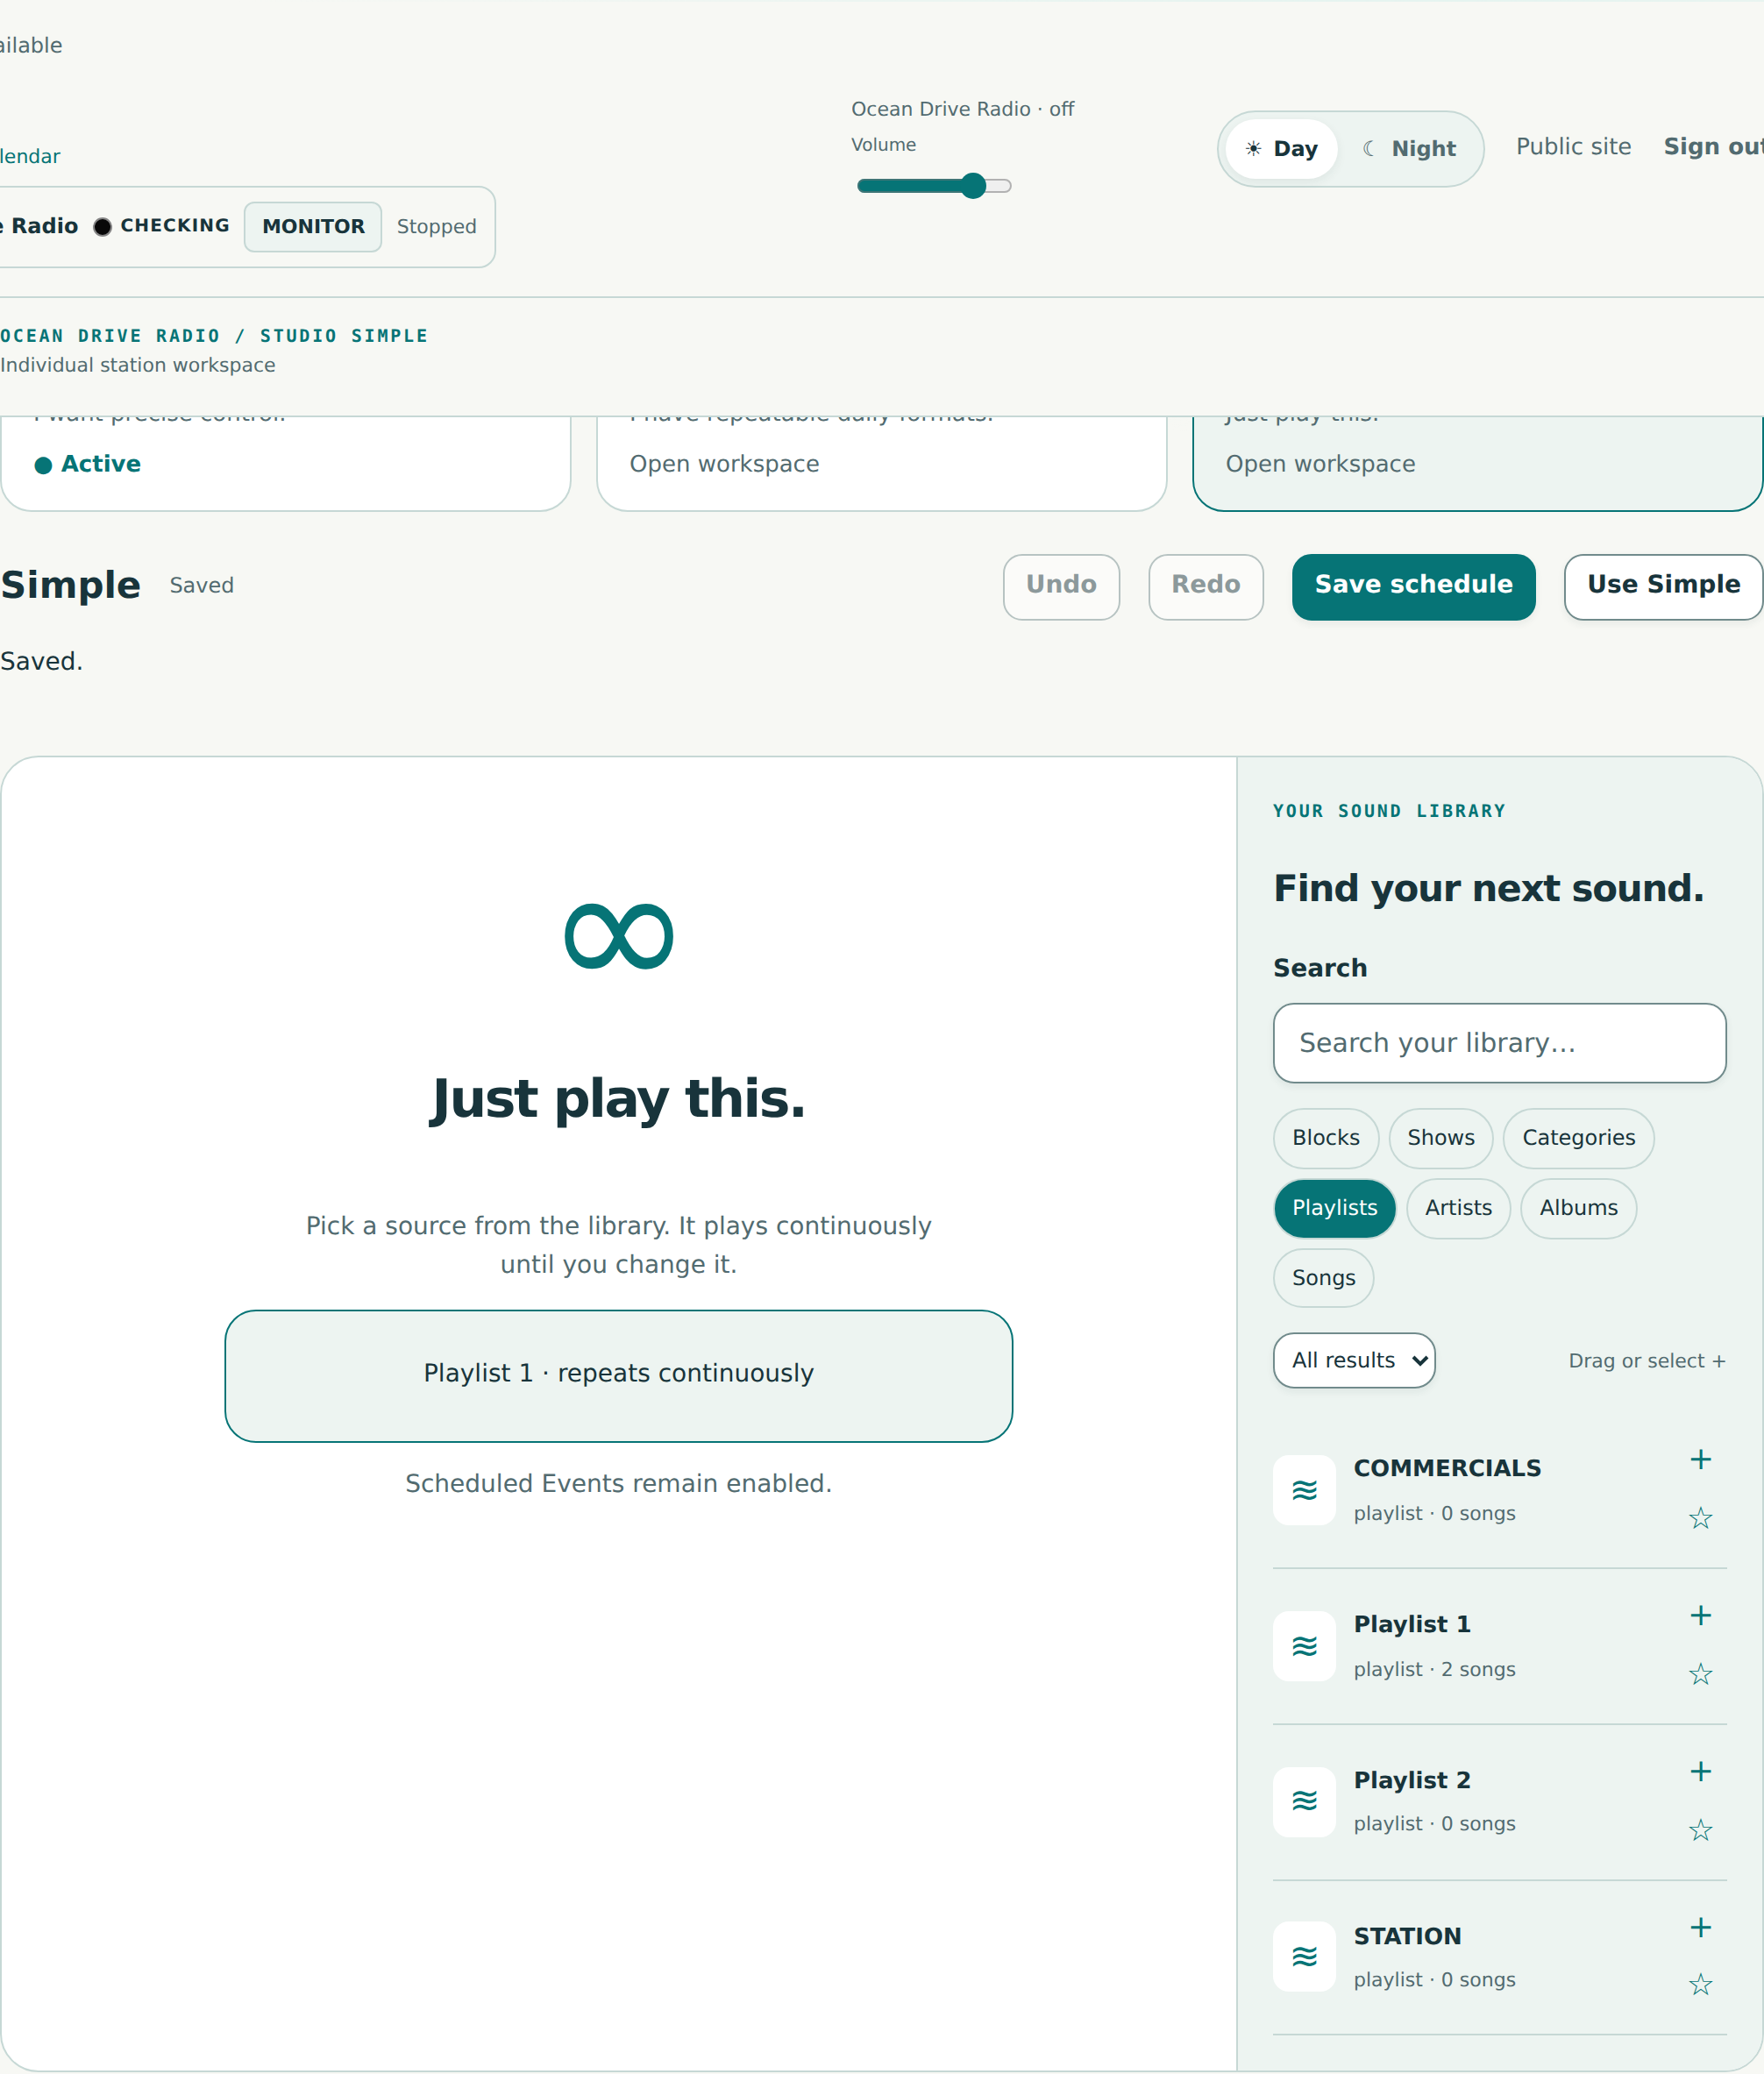
Click Save schedule at the top of the Simple workspace.
Wait until the save indicator says Saved. If an error appears, keep the page open and resolve it before moving on.
Tell the station what to play.
Activate Simple
Click Use Simple. This is the activation button.
Wait for the status to show Active mode: Simple. The station should switch from its test tone or previous programming to the songs in Playlist 1.
Hear what your listeners hear.
Listen with Monitor
Click MONITOR beside your station name at the top of the admin area. Turn up the monitor volume and your device volume.
Listen for your song. If you hear only tone, check Playlist 1, the Saved indicator and Active mode: Simple. If there is silence, use the checklist at the end of this guide.

Now give someone a reason to press play.
Open the player. You’re live.
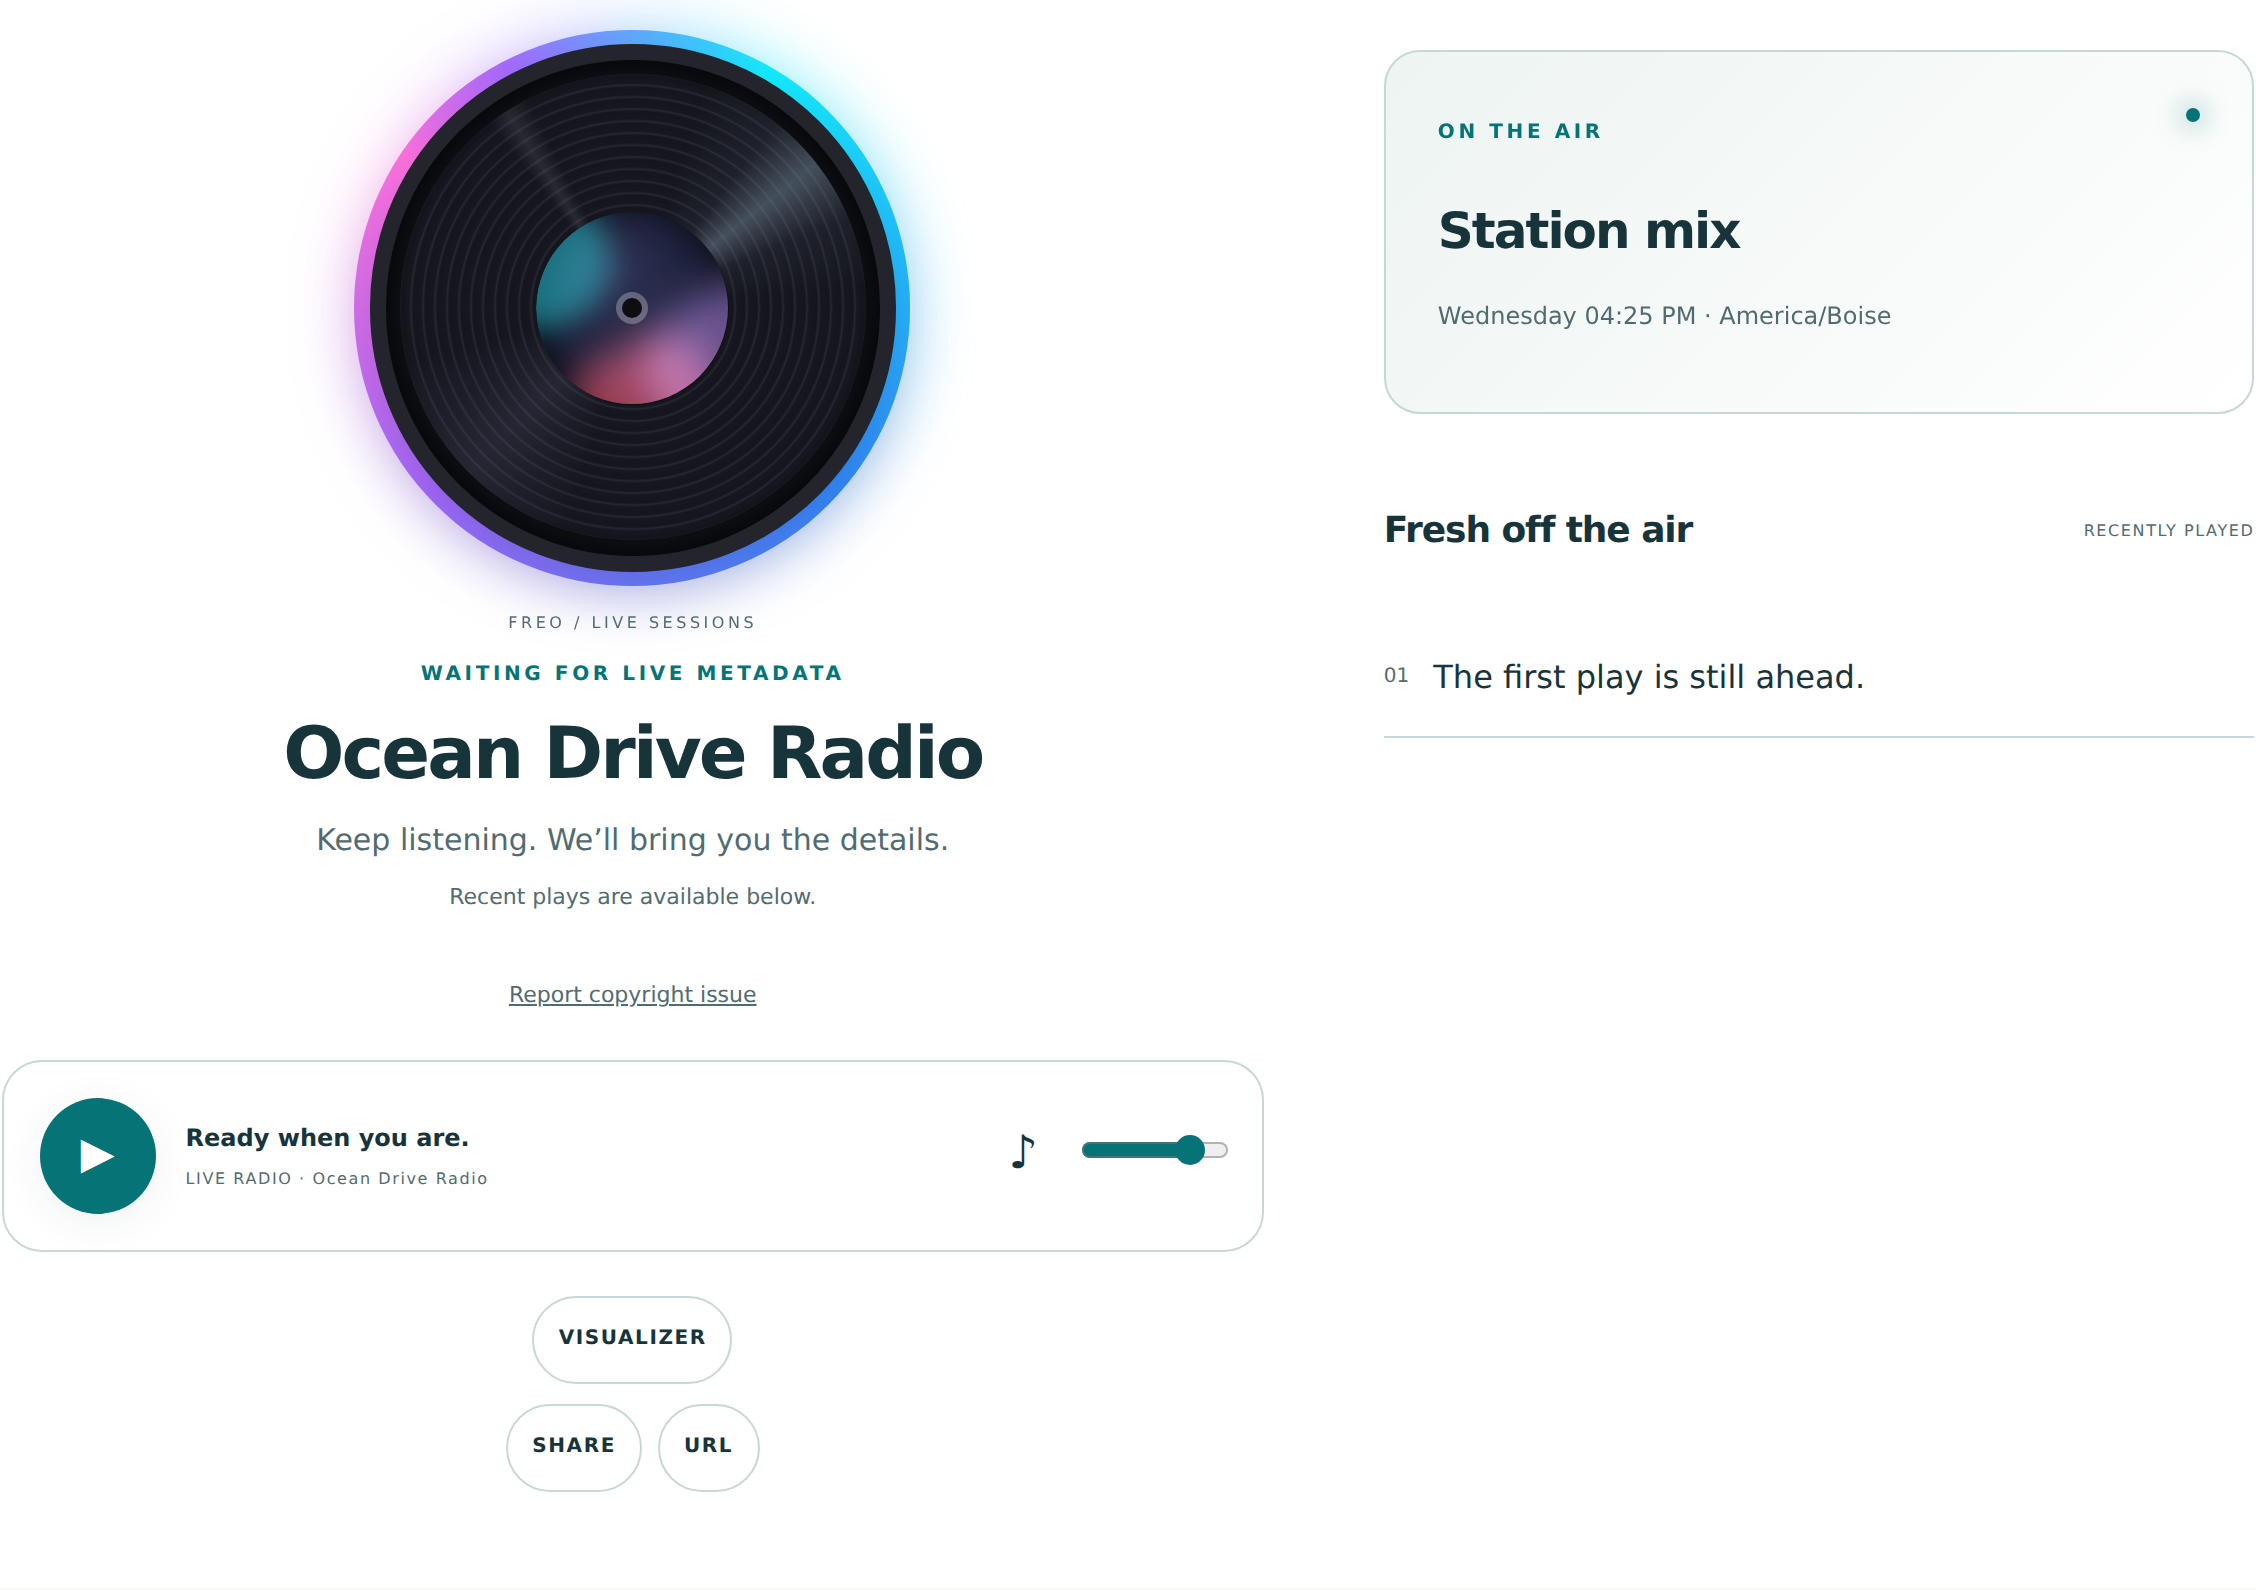
Open Public site, choose your station and open its player. Press the player’s Play button; browsers often require this click before audio can begin.
Confirm you hear your song, then use SHARE or URL to send your public player link to a friend. Share the player, not your private /admin link.
A LITTLE HELP, IF YOU NEED IT
No music yet?
Let’s check the basics.
I can’t sign in.
Use the station link in your ready email. Enter your Studio email and the station password you chose during setup. The Studio account and station may have different passwords.
I hear a tone.
Make sure Playlist 1 contains enabled, fully imported songs. In Simple, select Playlist 1, click Save schedule, wait for Saved, then click Use Simple and wait for Active mode: Simple.
I hear nothing.
Check Master Broadcast is ON. Click Monitor or the public player’s Play button yourself. Check the page, browser tab, device volume and audio output. A status badge alone is not an audio test.
I don’t see my station tools.
Choose your station in the sidebar and click Switch. If it still says Preparing, let setup finish and refresh before continuing.
I hear two copies or an echo.
Stop Monitor before listening through the public player. Keep just one listening tab playing.